A new Bounty Hunter-Shae Vizla The Old Republic

Ideas, tutorials, questions relating to armour, costumes and replica props from the Star Wars universe
Post Reply
User avatar
mdb
Captain
Captain
Posts: 400
Joined: Fri Mar 05, 2010 9:48 am

Re: A new Bounty Hunter-Shae Vizla The Old Republic

Post by mdb »

I've been keeping a bucket of water handy when I'm heatshaping so I can shape, hold and pray and dunk in the water ;) My poor leather gloves are getting a tad brittle but cold shocking does seem to help a lot. If you can hold the curls open until you can shock them anyway...

Also, sigh. I have started sculpting the greaves properly.

I may have mentioned it here, but I was sent some lovely model renders of Shae and while I don't have permission to share them I have been glaring, er, staring at them as they taunt me with how much detail was put into the model ;) The thighs and greaves have been the worst for bugging me ;)

My photos aren't that great so I'll get some once I have the molds ready to go :)

Also, this is freaking cool:

He used a photo of me as Shae and if you scroll through to the third batch that's me as Mara XD
So I'll be hitting up a few places looking for these puppies ;) there is a third image of me as Mara in the same block, which just really made my Xmas ;)
User avatar
badges2nz
High Colonel
High Colonel
Posts: 1047
Joined: Fri Jul 23, 2010 11:35 am
Country: New Zealand
Location: Otaki

Re: A new Bounty Hunter-Shae Vizla The Old Republic

Post by badges2nz »

The artwork on these cards is really something else, I suppose there might be some limited edition signed cards from you then if available?
Doomsday and Armageddon got together and had a baby and man is it ugly.
User avatar
mdb
Captain
Captain
Posts: 400
Joined: Fri Mar 05, 2010 9:48 am

Re: A new Bounty Hunter-Shae Vizla The Old Republic

Post by mdb »

Sorry no, I'm looking for them for myself. Sigh. Just the inspiration not a paid model ;)


Meanwhile as the first cycle of Armageddon is over and I have a break from wearing Shae for a while I am working on the upgrades :) So far they are working well, possibly because while I do not have a close time limit I am working as if I do- balance of getting thinsg done without the panic stress freak out ;)


So it is not very exciting to look at ;) But here is what I have actually done (I think I have photos on my camera, these were just from my phone)
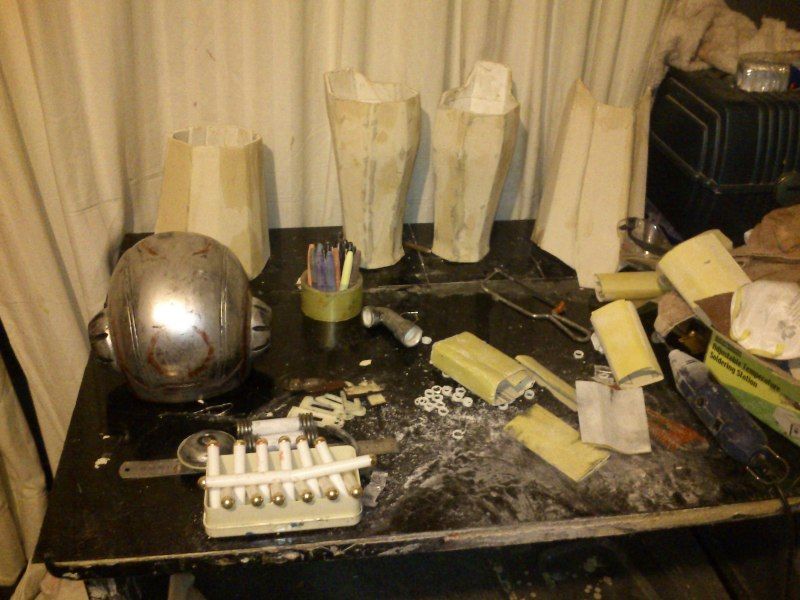
Jetpack:
Image
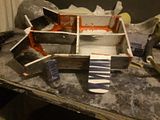
Half an inch taken off the top and ditto the sides, this has considerably reduced the weight but also made the piece look more like in game. Proportion wise I was pretty close- this should not be oversized or it looks like a backpack.
The red pvc weld is purely coincidental though I really felt like a hack cutting up the jetpack.

Arm displays:
Removed, sanded back to resin and the light up areas cut out. Just debating exactly how I am going to work them (insert clear acrylic or pour clear acrylic. I am going to dremel out some more of the back too for wires and leds. I have a whole heap of brilliantly functional lights from Xmas tree decorations and I can probably cut them down to fit :)

Image

Pouches:
(See above)
Forms made from sheets of sintra lamenated together. Made the form the same size as my phone to allow the leather to fit exactly. Over time the pouch should ease a little and soften a tad. Not much! I have just enough leather left over to start forming it :)


Ammunition armbands:
Tubing procured! Woo! I suspect it was junk (in a bin) but for the price I was quoted I don't care. Also the shop is in receivership so again a hand ful of dollars is fine. It is about the width of curtain tubing, the stuff usually reserved for net curtains, but is plastic so they will be light but also won't trigger any alarms!
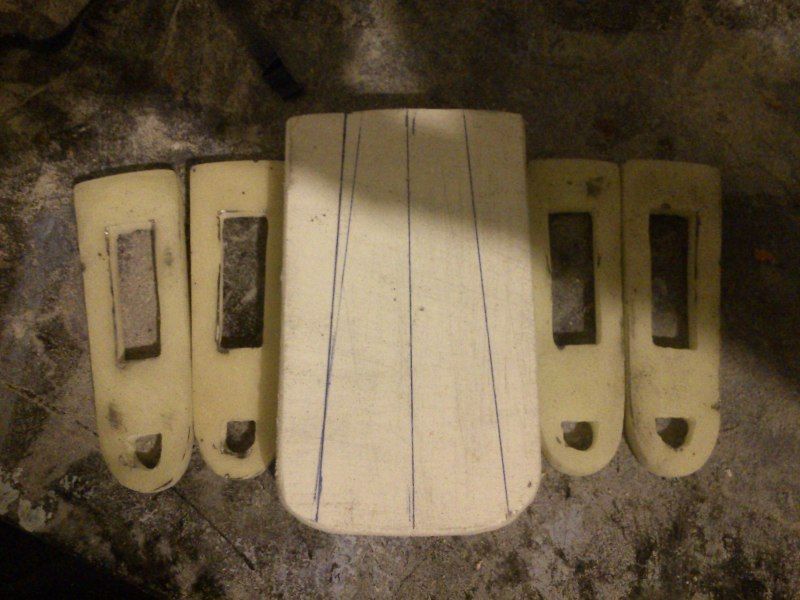
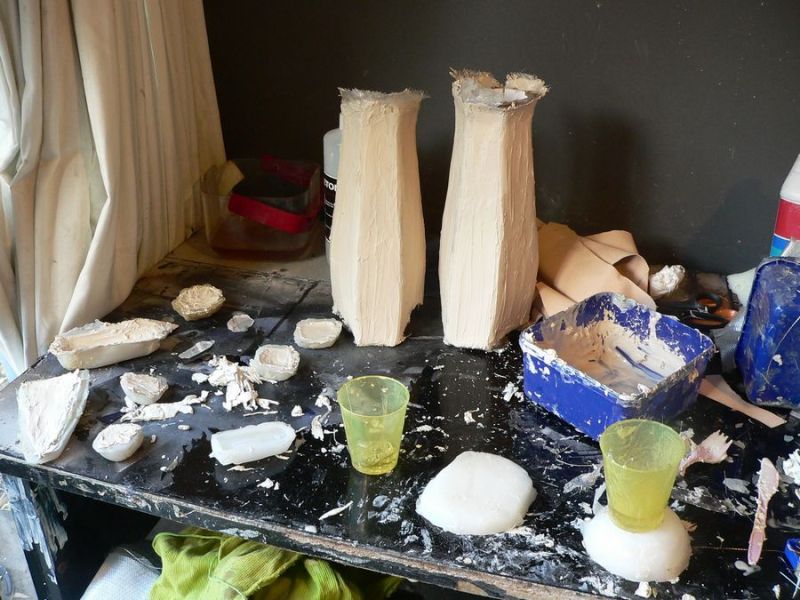
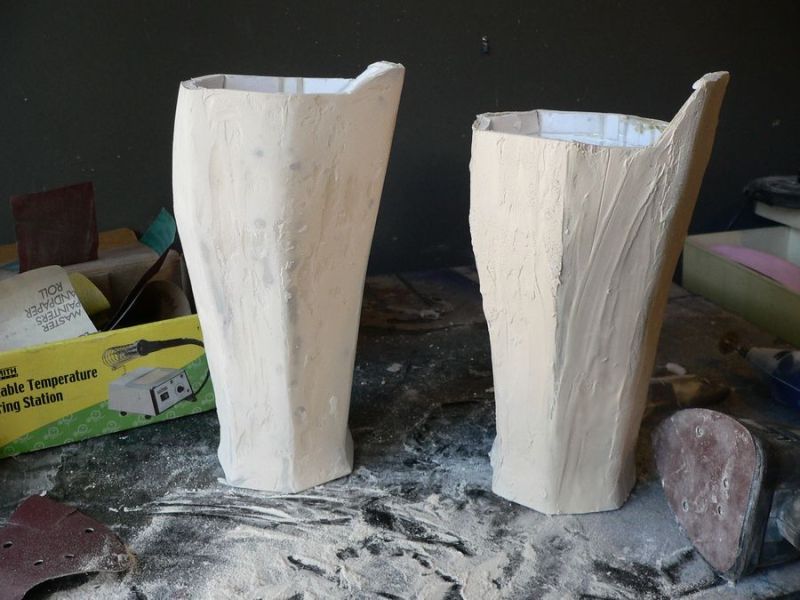
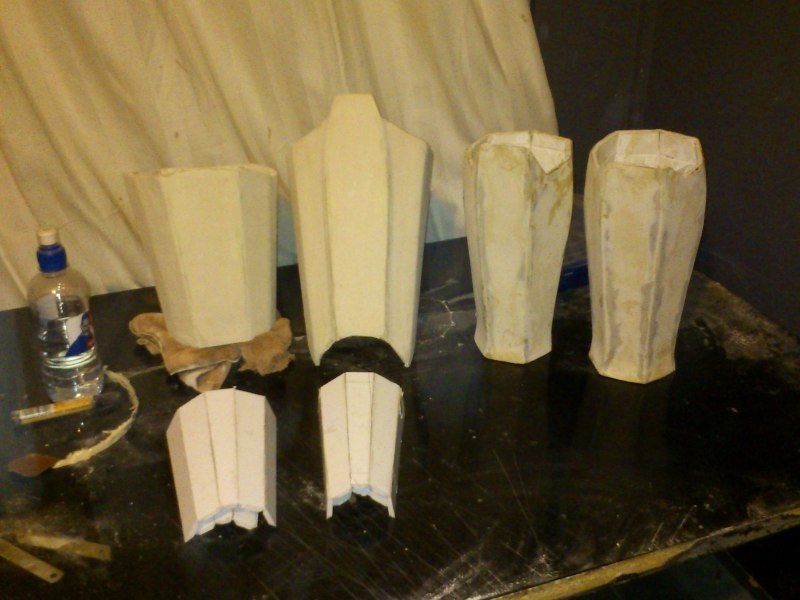
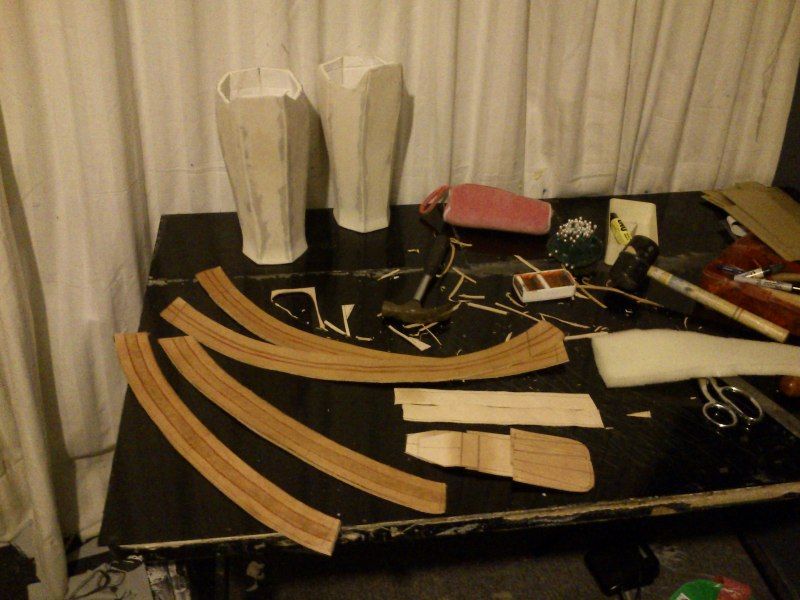
Greaves:
Template in card is not working. Partly because the humidity in Auckland means card goes wobbly all too quickly, partly because I am way too impatient. So I have started what I hope to be my final pass at a form to resin over (I want to get cloth and need filler so I need to save up for that). Love the shape of my pattern it's just a matter of getting the method down.
I just glued the pieces tonight so I hope to be able to get a layer of resin on tomorrow. the shapes look great :) I also need to clear plasticine off my mannequin to fit these over to keep in good shape.
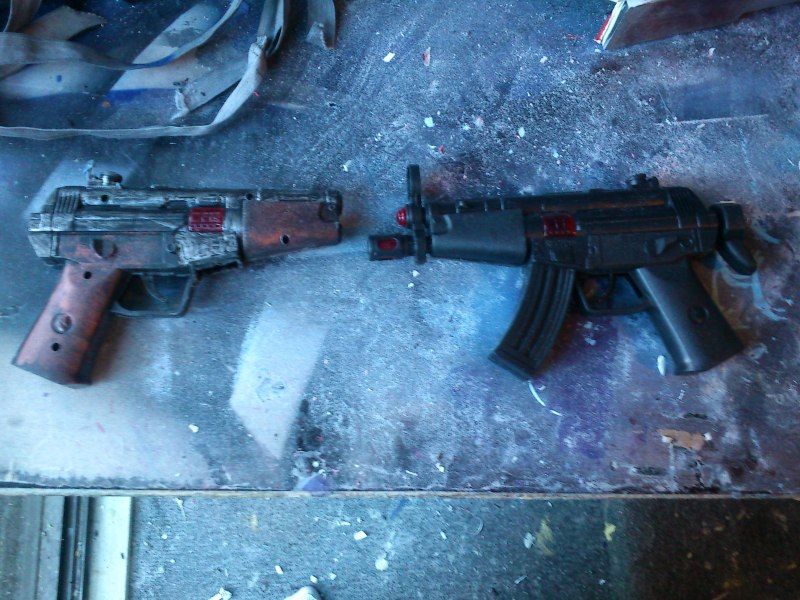
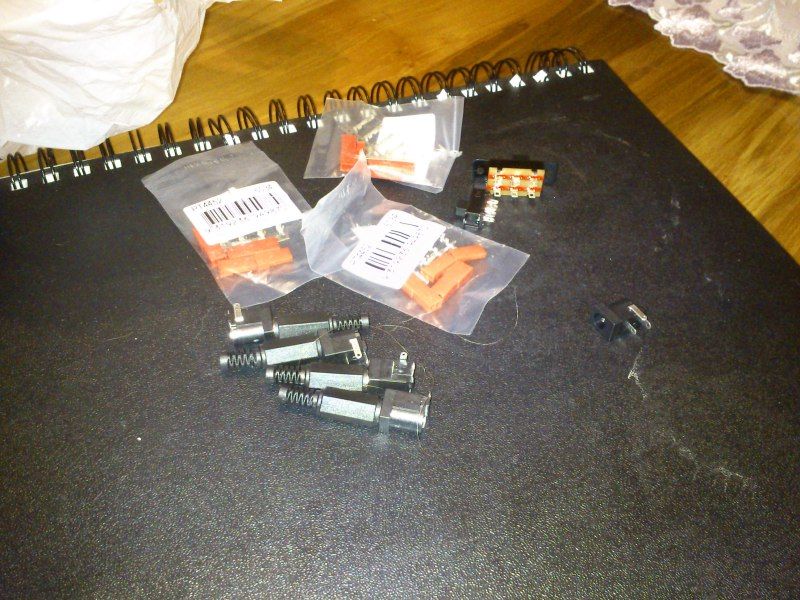
Blasters:
Image
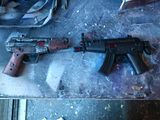
I have cut up two freebie toy guns as I am not risking any prop I work on getting confiscated by airport security. These look really good and in world. In fact they remind me of early weapons I used in the game (and there is a blaster I just passed over on Voss or Belsavis, a Shrieker that is very very similar indeed).
Also I found blasters offer far more easy posing opportunities. I love my big gun but it requires two hands to hold. I Will probably use magnets and hooks to secure them to my belt. there will be wires going through the belt anyway so hiding some magnets between layers will be fine. I de-sparkified the trigger mechanism. Though am also tempted to just rip that out. I'll see how the glue has held up and if I can gut them I will. May try to get some lights in there as well, depends on how easy it is to remove batteries (again airport concerns- I will buy All The Batteries at Walmart by the venue, i think I can budget for that ;) )

So next on the agenda:

Belt:
I will need more leather sadly :( But I should be able to find other uses for the rest of the leather. Heck my SCA kit could do with a few bits and pieces :) Belt grade leather should be easy to use up :) Same shape as my current belt but it will be tooled and properly dyed and polished.


Thigh pieces
Might be the same method as the greaves, given how the armour looks in game :)


Gas cylinder and belt canister:
Both hollow tubes, both getting resized to be smaller and lighter and still be functional.

Gauntlet display:
I have ripped open a cute alarm clock, but also have a touch screen calculator I am considering pulling apart. Depends on which most convincingly can be made to read out garbage that looks appropriate. Or I wind up spending way too much on some programable display pieces I have been watching for a while....
I just had another look, I may go a different route entirely if I can get access to a laser engraver.


Sanding chest guard and back plate to crispness. I was doing this already but I spent way too long trying to get the size right so now I can cut out the back and smooth the top.

Widening then tidying the guantlets.


I do also want to crisp up the helmet details and I have to make a new rangefinder. With proper pvc this time. I swear I have styrene not pvc.... if it glues with shoe goo but not with pvc weld...... And figure out a way to have the support for that as well as batteries for the leds in the ear buds in the same place. Should be able to go with coin type batteries actually....
User avatar
vctrsone
Lieutenant
Lieutenant
Posts: 161
Joined: Sun Apr 17, 2011 4:52 pm
Country: new zealand
Location: Central Auckland

Re: A new Bounty Hunter-Shae Vizla The Old Republic

Post by vctrsone »

*looks at his poor neglected and un-complete bounty hunter helmet*

I Need to get off the game and get back into my real life star wars stuff :)

Also I know your pretty handy with the old soldering iron but if you do need a hand with the lighting give me a yell..ive got some great recharge-able circuit diagrams for that kind of thing :)
Maker of stuffs and things.
User avatar
mdb
Captain
Captain
Posts: 400
Joined: Fri Mar 05, 2010 9:48 am

Re: A new Bounty Hunter-Shae Vizla The Old Republic

Post by mdb »

I will almost certainly be hitting you up for advice XD Definitely a fan of your Light Up the City lightsaber ;)

I do need to wrangle a little workstation to hold the wires though! I keep meaning to but forgetting.
User avatar
mdb
Captain
Captain
Posts: 400
Joined: Fri Mar 05, 2010 9:48 am

Re: A new Bounty Hunter-Shae Vizla The Old Republic

Post by mdb »

Image Image

New greaves templates! It's taken a while for various reasons and I have had to stop as my hand is tingling from the mouse ;)

So these are one layer of 200gm/m2 cloth and one layer of 100gm/m2 cloth with a coating of paste made from west systems micro filler. I'm going to sand and trim this layer and then cut each in falf, tidy and them pull out the support so I can get another layer of glass in the back (matting this time). Though to be honest they are so wonderfully light at the moment I am loathe to do so!
User avatar
mdb
Captain
Captain
Posts: 400
Joined: Fri Mar 05, 2010 9:48 am

Re: A new Bounty Hunter-Shae Vizla The Old Republic

Post by mdb »

So.. I decided I'd redo the gauntlets as well seeing as I bought a little extra resin.
Image Image Image

The leatherwork has gone further, the belts are fully tooled and dyed. I need to seal and silver them.
The pouches are now made from vinyl fltlined with canvas.

Yes, the greaves, gauntlets and thigh pieces all have fairly flat planes. This is because the model renders I was given from an official source show this. And the gear in game is even more so.

My hands are a bit raw ;) But I did find I could wear the thigh pieces to help sand :)

I have also started assembling the new armband rounds. some more plastic tubing and goldtone shanked buttons. Today I'll be getting more glue in those ends before starting the other ends.


I am also delaying the Point of No Return with cutting the greaves in half, thighs into all the various parts and the gauntlets into hinged pieces.

I am probably going to flatten some PVC pipe scraps to redo my range finder. It really is the least likely material to snap, again. At least of what I have on hand.
User avatar
mdb
Captain
Captain
Posts: 400
Joined: Fri Mar 05, 2010 9:48 am

Re: A new Bounty Hunter-Shae Vizla The Old Republic

Post by mdb »

Point of no return reached and the greaves and thighs have been cut. And a test paint to see how they look, pretty happy with them, and now sanded back to primer grey and a layer of glass laid on the inside. So pleased I did :)

They are light still but a little more rigid but as the inner is just one layer of cloth (200gm) it is still pretty flexible. Just not so flexible it feels like the pieces are going to warm up too much and warp when worn.
Image
Expensive electronics. Is there anywhere else other than Jaycar to buy this stuff? I think JA Russell has some (I know I saw switches but I used to go there only to grab the long cable ties for my historic corsets- it works like real baleen vs metal).
Still not sure I want to install too much in the way or wiring in what essentially looks like a backpack....

Image
New gauntlets in progress :) Recast the flamethrowers from my molds but in a lighter filler (microballoons vs cabosil) Glued in place with some thick EVA foam (about 5mm gap all around the edge of the underside) then bogged with more filler and smoothed.
The mini rockets are pens cut and then recut and some PVC pipe cut with a dremel and glued to some sintra with pipe weld. I cannot recommend this glue enough if you are using PVC in any form (pipe, extruded sheet, foam board/sintra/forex) it does weld. It takes a while to fully set but I think I am going to be okay for getting to the US with fully cured pieces :)
This weld is red and so is a good 1/3 cheaper than the other options and I am okay with bleeding seam lines ;)

Image
Test of all the leg pieces in silver. Have cut that right back. Still debating on my final paint choice.

Image
Testing the pieces in the suitcase. Rigid suitcase so I just need to make sure I can seal all the fabric pieces in the top half and bubble wrap the armour in the lower half.

Image
Mini Rockets drying on the heater. Please note I have the heater on to warm the room then turn it off before putting anything on it. And it gets unplugged even.

Image
Rounds for the upper arms in progress. This PVC tubing really really melted with the PVC weld so I wound up using Araldite for these in the end. As well as elastic to string between the buttons to hold them in place.
Also one of the mini rocket launchers in progress. It was a little hard cutting with my dremel...

Tomorrow I trim the armour inner support, sand out the finger prints from holding pieces while painting resin on the inside. Then wipe with acetone and work out what rigging is needed. I think velcro tabs will be most travel and wearing friendly.
Then more acetone to cut back the paint on all my other pieces ready to be repainted as soon as Auckland stops being so damp or I risk heat stroke heating the workroom. After ventilating the smell of acetone out.


I'm also working on some other SWTOR costumes, one of which my Sith Inquisitor wears. I still haven't totally given up on the idea of a pared back Thana Vesh (Thana Vesh with graphics levels all set to low or off perhaps.....) Not many photos that aren't blurry up past 11pm and fighting sleep and camera of the fritz types though ;)


I should add I have lost a mouse droid sander and one rotary tool in making this already. I am pushing my latest rotary tool to the limit and indeed has just lost the ability to change gears. Now everything is at FASTEST SPEED. My ears are still buzzing. From yesterday. or the day before.
User avatar
Bazzack
Colonel
Colonel
Posts: 986
Joined: Thu Jan 07, 2010 11:14 am
Country: NZ

Re: A new Bounty Hunter-Shae Vizla The Old Republic

Post by Bazzack »

Very nice. I look forward to seeing it all in person :)
User avatar
MattG
Site Admin
Site Admin
Posts: 4921
Joined: Tue Nov 10, 2009 5:46 am
Country: New Zealand
Location: Auckland

Re: A new Bounty Hunter-Shae Vizla The Old Republic

Post by MattG »

I'm sure this will be very well received at C-VI/D*C. Looking forward to seeing the upgrades :)
Post Reply